
Using the CSV transfer option
Question
How to use the CSV transfer option in the control panel?
Answer
The CSV transfer option is very useful when you want to transfer multiple domains with different data or different transfer dates.
Just follow the steps in the control panel to get this started!
1. Download the CSV template
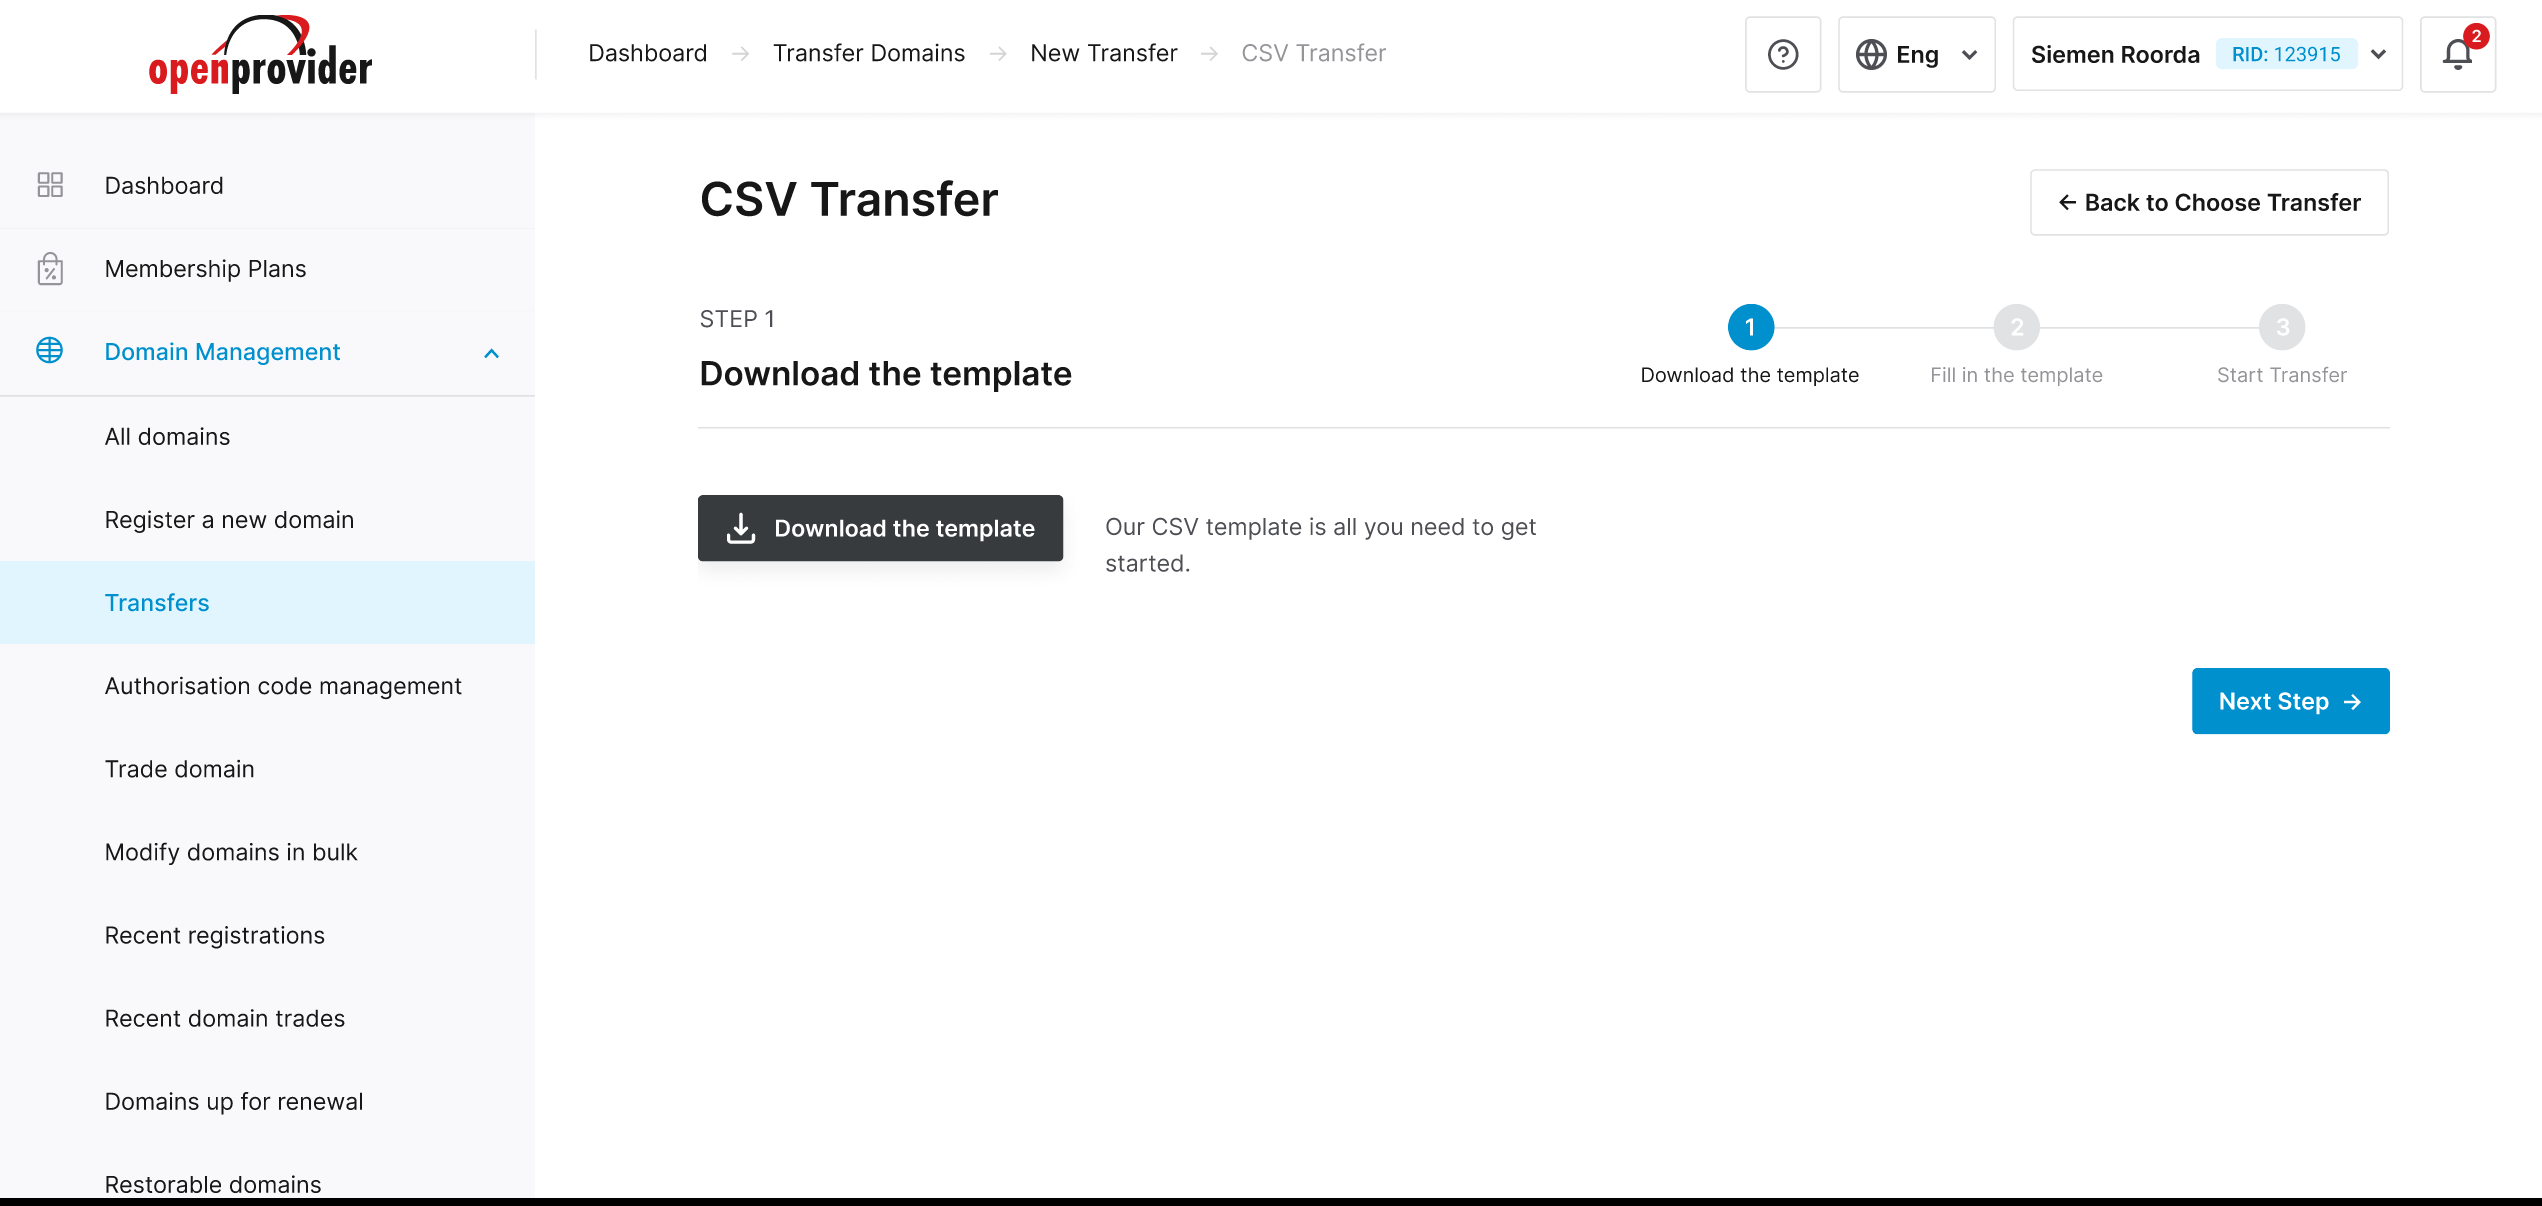
Always start with downloading the CSV template from the control panel.
Save this as .csv on your computer and make sure not to adjust the file format (no xls, xlsx, ods, txt etc)
2. Fill in the CSV template
Open the CSV and add the required information.
The CSV might look intimidating, but in most cases, the information can be copied and pasted from the current provider, or existing Openprovider handles can be used.
Please note that the format of the template may not be adjusted. It is not possible to add or remove columns or rows as this will make the file invalid during upload. Not all fields are mandatory to fill in. Click here for full CSV details for a description of how to fill in the fields.
The limit is 500 domain transfers per file.
3. Upload and parse the CSV file
Once the file is prepared, is time to upload it. Use the upload button or just drag en drop the file in place. The control panel will check if the file is correct. For instance:
-
File format (for example make sure it’s a CSV and not a PDF)
-
File structure (making sure no columns are missing from the file)
-
Values in the file (for example checking that the date format or the phone number format is correct)
In case errors are detected in the file , the control panel will show them directly:
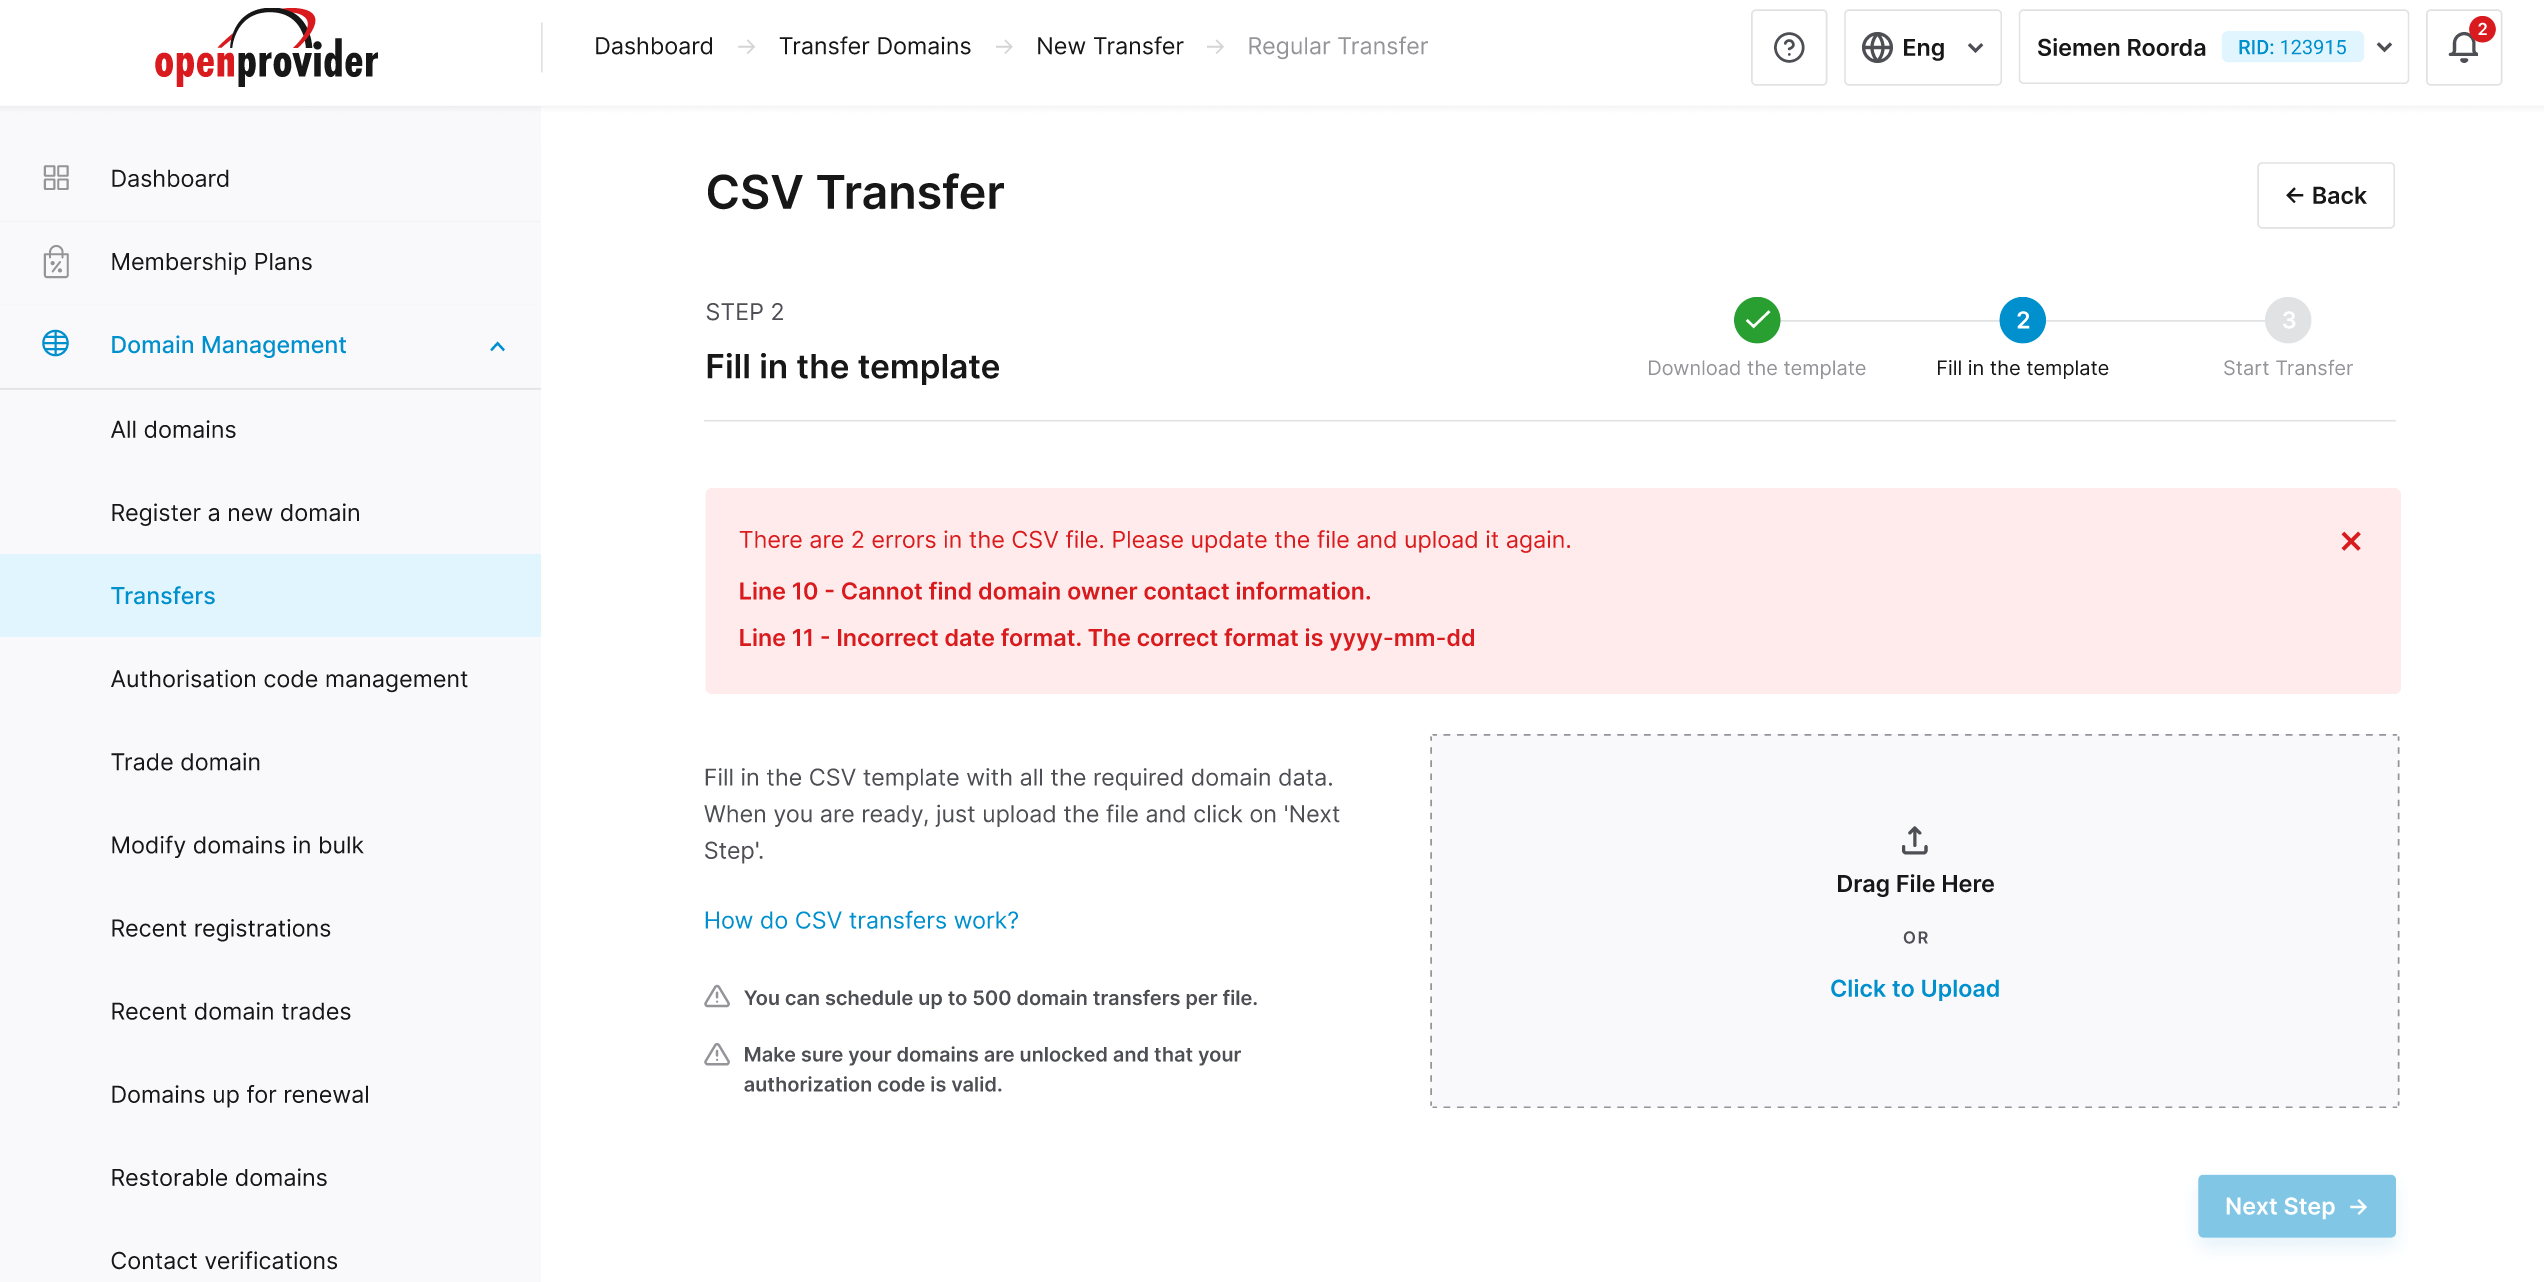
Please correct the errors in your CSV file and upload the file again.
In case an error description is not clear, let us know via support@openprovider.com and we will explain how to resolve the problem in the file.
4. Start Transfers!
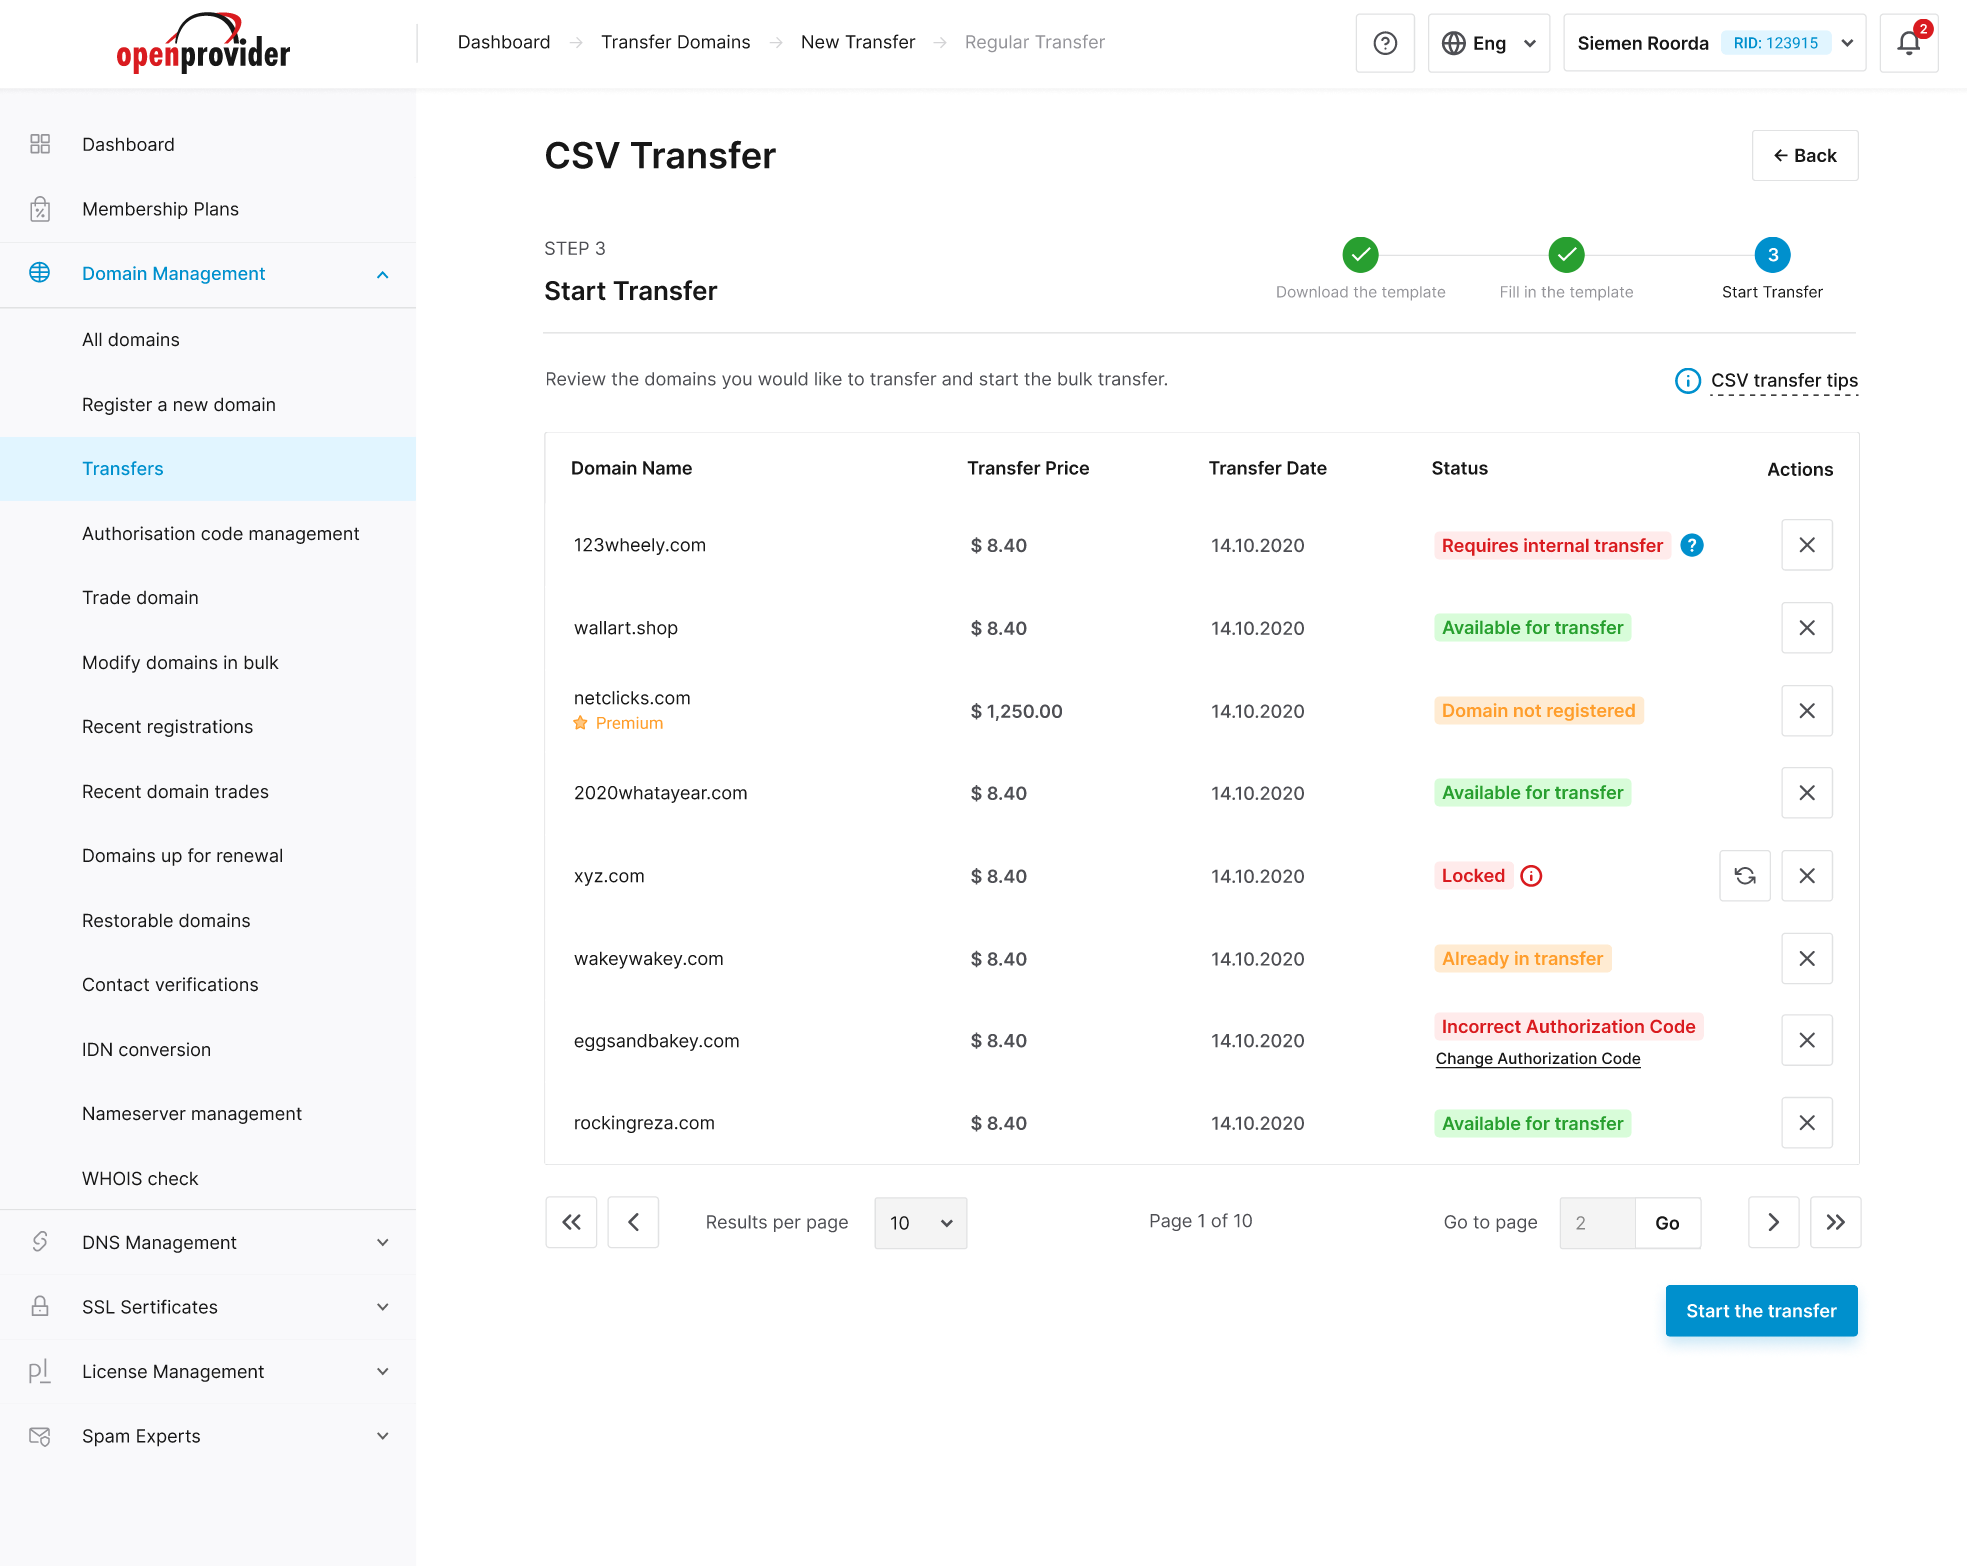
When the CSV file is correct and successfully uploaded, the control panel will take you to the next page: “Start Transfer”.
On this page you can review all the domain transfers from the CSV file and make changes if required, for instance:
-
Remove a domain transfer from the list
-
Change an invalid authorization code
-
Unlock a domain and refresh the status
Note:
Registry unreachable → shown when a registry doesn’t respond, in this case, we can’t determine if the domain is locked or available for transfer. Usually occurs when a Registry is unavailable due to maintenance.
Once satisfied with the results, click on “Start the Transfer”
The control panel will create the domain transfers in the system. It might take a few minutes for these domain transfers to appear in the transfer overview. Just have patience, this delay is completely normal because this is a task executed in the background, so you can continue other actions in your control panel.
Note:
If you encounter any issues with CSV transfer via RCP, please submit a request to support using the attached template and we will process it. There should be no “ - “ in column names. Column “Owner address” should be separated into “Owner street”, “Owner address number” and “Owner suffix”. If the Admin handle needs to be the same as Owner, you don’t need to fill in the contact data, but specify in the “Owner” column value “0”. If the ‘Owner’ column is empty and not all info for the new handle is provided, an error will be returned. Same for Tech handle - “0” if it needs to be the same as Owner.
FAQ
Do you have questions after reading the documentation? Please check if your question is already answered in the scenarios below:
Q: I see a transfer price mentioned in the transfer overview, will this be directly charged when i start the transfer?
A: No, this is an estimated transfer price for each domain. In case the domain is scheduled with a date in the future, the complete balance does not need to be present in the control panel yet. Prices mentioned at this stage are an estimation and subject to changes, for instance:
-
When a domain transfer fails or a domain is locked we won’t execute that transfer, therefore it won’t be charged.
-
Registries can always change their price and that can affect the transfer price at the moment the transfer is executed.
Q: What happens if my balance is not sufficient for the whole amount at the moment I upload the CSV file?
A: When you upload your CSV file and click on the button “Start the transfer” our system will check for each domain transfer you schedule if you have enough funds. This is not a cumulative check, however. In other words, the check is executed against the single domain transfer price and not against the total sum.
In case the transfers are scheduled with a date in the future, there will be no balance reserved yet. This will only be done at the moment the transfer is executed.
In case the transfer is started immediately, the transfer will be initiated and the transfer fee will be invoiced.
Q: What will happen if a domain is currently locked or a code is invalid, but I continue to transfer them anyway?
A: In case the transfer date is in the future: The domain transfer will be correctly created in the status “Scheduled”. However, when the execution date comes the domain transfer will fail unless the domain was unlocked in the meantime or the code was updated in the scheduled transfer request in the meantime.
In case the transfer date is immediately: In this case the transfer is supposed to start immediately, but because of the locked domain or invalid code, there will be an error popping up in the control panel and the transfer will not be created.
Q: Some extensions require additional data, how do I manage this?
A: Correct, some domain extensions, for instance, the ccTLDs, can require additional data in the handle (like a social security number or VAT number). This data unfortunately cannot be specified in the CSV file.
When additional data is required, the easiest workaround is to manually create the handle in the control panel and provide the handle reference in the CSV file.
Another option is to import the CSV file first, so our system can create the handle for you. Afterwards, you can add the additional data to the handle via the handle management menu.
We always advise you to get familiar with the extension requirements and transfer process via our Knowledge Base before starting a transfer.
Q: I just started a CSV Transfer, however, I got a few notifications for some errors in RCP. Where can I see the full list of errors generated by a CSV Transfer?
A: Even if you carefully prepared your CSV file something might go wrong. For instance, you don’t have enough funds in your account or you haven’t accepted yet the contract required for a specific domain extension.
You will get a notification error in RCP for this and the corresponding domain transfer will not be created.
All the errors generated when starting a new CSV transfer can always be seen on the following RCP page: https://cp.openprovider.eu/web/action/index#/bulk/overview
Q: Can the CSV also be used for internal transfers? (Domains which are currently managed by a different Openprovider reseller)
A: Yes, you can use CSV Transfer also to schedule an internal transfer. Just make sure you have the right auth code and domain contact data.
CSV Template Details
| Name | Required | Format | Notes |
| Domain name |  |
domainname.extension | |
| Nameservers | array of hostnames or IPV4 addresses (separated by ;) - for instance ns1.mydomain.com; ns2.mydomain.com | Glue records are not supported | |
| Nameserver group | Alphanumerical string, for instance dns-openprovider (this will use our default nameserver group) |
Provide the ns-group name If both the Nameservers and Nameserver group columns are left empty, then the system will use the default Openprovider DNS. If the user specifies both the Nameservers and the Nameserver group columns, then the Nameserver group value will be used. DNS templates are not supported |
|
| Owner – Openprovider handle | AB012345-NL (as it can be found within RCP) |
||
| Owner – internal reference | any alphanumerical string that reseller prefers | This is a unique customer code that the reseller can specify (for example it’s used by their own administration/database). When an Internal Reference is specified, Openprovider will create only one handle for each customer in RCP. If in a domain further below the same code is used, then Openprovider will not create a new handle but re-use the previously created handle and ignore the data in the spreadsheet. If a user specifies both Openprovider handle and Internal reference, then the system will use the Internal reference value. |
|
| Owner – company name | alphanumerical with special characters | ||
| Owner – first name | alphanumerical with special characters | ||
| Owner – last name | alphanumerical with special characters | ||
| Owner – address | alphanumerical with special characters | ||
| Owner – zipcode | depends on the city | ||
| Owner – city | alphanumerical with special characters | ||
| Owner – state/province | alphanumerical with special characters | ||
| Owner – country code | ISO 3166-1 alpha-2 country codes | The complete list of country codes can be found here: | |
| Owner – phone country code | Example: +31 / +34 / +91 / +7 | ||
| Owner – phone area code | number only | Is the digit right after the phone country code, for instance: +31 6 2727282 - in this case it would be the 6 |
|
| Owner – phone subscriber number | number only | Is the remaining part of the phone number | |
| Owner – fax country code | Same logic as the phone number | ||
| Owner – fax area code | |||
| Owner – fax subscriber number | |||
| Owner – e-mail | standard email format | ||
| Admin – Openprovider handle | Same logic described for the Owner handle VS Owner internal reference |
||
| Admin – internal reference | |||
| Admin – company name | |||
| Admin – first name | |||
| Admin – last name | |||
| Admin – address | |||
| Admin – zipcode', | |||
| Admin – city | |||
| Admin – state/province | |||
| Admin – country code | |||
| Admin – phone country code | |||
| Admin – phone area code | |||
| Admin – phone subscriber number | |||
| Admin – fax country code | |||
| Admin – fax area code | |||
| Admin – fax subscriber number | |||
| Admin – e-mail | |||
| Tech – Openprovider handle | |||
| Tech – internal reference | |||
| Tech – company name | |||
| Tech – first name | |||
| Tech – last name | |||
| Tech – address | |||
| Tech – zipcode | |||
| Tech – city | |||
| Tech – state/province | |||
| Tech – country code | |||
| Tech – phone country code | |||
| Tech – phone area code | |||
| Tech – phone subscriber number | |||
| Tech – fax country code | |||
| Tech – fax area code | |||
| Tech – fax subscriber number | |||
| Tech – e-mail | |||
| Auth code |  |
Required for all tld's that require a transfercode for successful transfer. This code can be adjusted later. | |
| Transfer date |  |
yyyy-mm-dd | The transfer date is always required. It can be the same day in case of a transfer scheduled to start immediately. |
Important Note:
Owner, Admin, and Tech handles are required for the successful transfer of domains. You can either specify an existing handle or provide information (Company name, first name, last name, address, etc.) required to create new handles. If the Admin handle needs to be the same as the Owner, you don’t need to fill in the contact data, but specify in the “Admin” column value “0”. If the ‘Owner’ column is empty and not all info for the new handle is provided, an error will be returned. Likewise for "Tech" - “0” if it needs to be the same as Owner.