# WHMCS Email Solution Module - Installation and configuration
**This article provides step-by-step guidance on integrating the Openprovider Email Solution module with WHMCS.**
**For quick navigation, the following topics are covered:**
- Uploading the Openprovider Email Solution files
- Configuring the Openprovider Email Solution server module
- Creating a product group and product
- Linking the product with the server module
### 1. How to upload the Openprovider - email solution files?
1. Download the module file from [here](https://github.com/openprovider/Openprovider-WHMCS-Email-solution).
2. Extract the downloaded module file.
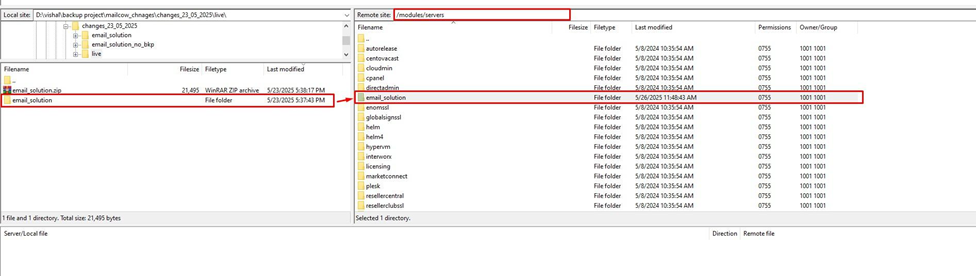
3. Inside your WHMCS installed directory, go to this path "**/modules/servers**" and upload the folder '**email\_solution**'.
### 2. How to configure the Openprovider - email solution server module?
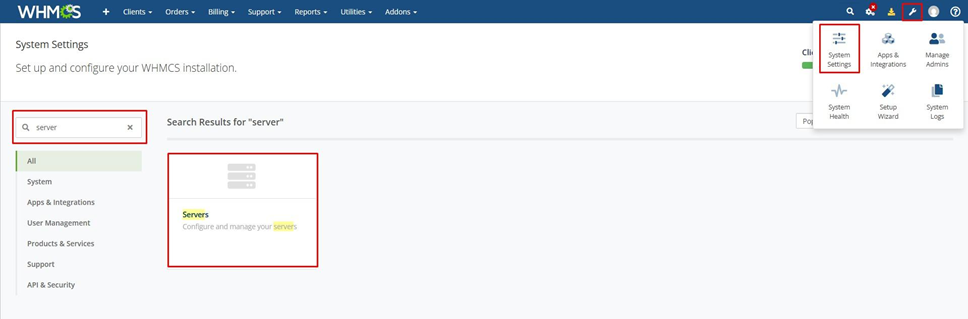
1. Go to **Configuration** >> **System Settings** >> **Servers**.
2. Click on **Add New Server** and then click the **Go to Advance Mode** button.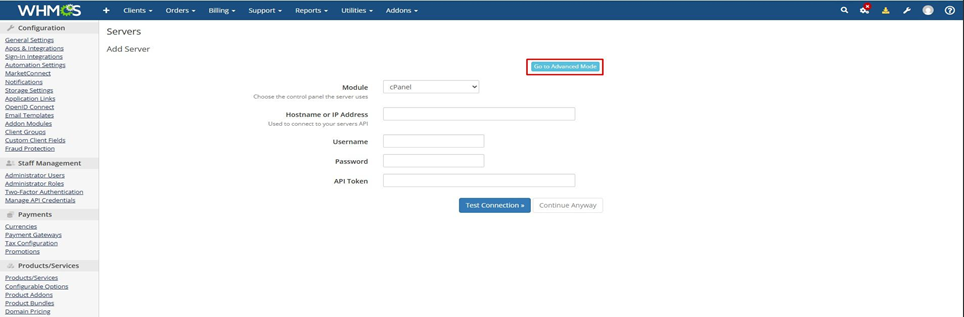
3\. Fill in a name of your choice (eg: Email Solution), API hostname (**api.openprovider.eu**), and select module **Openprovider - email solution,** and fill your API username and password, and click the **Save Changes** button. Please ensure the user you are using has API access enabled. If not, please enable API access for the user following instructions in [this article](https://openprovider.help/books/quick-start/page/how-to-enable-api-access).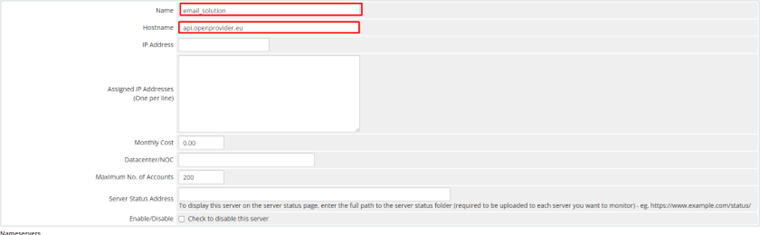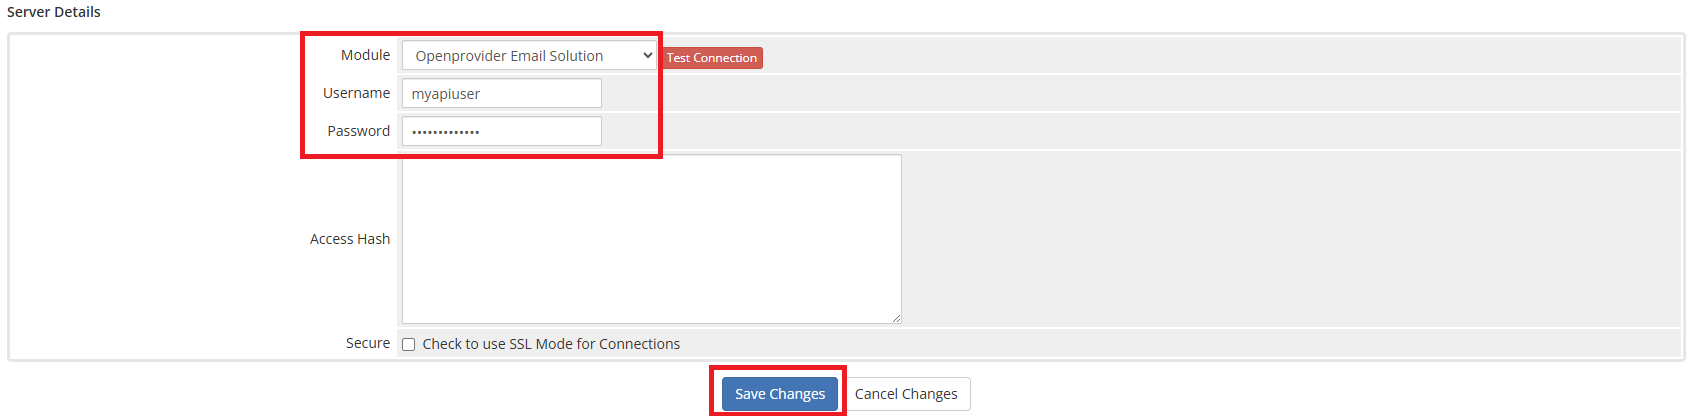4\. After Save click on edit button then click **Test connection.**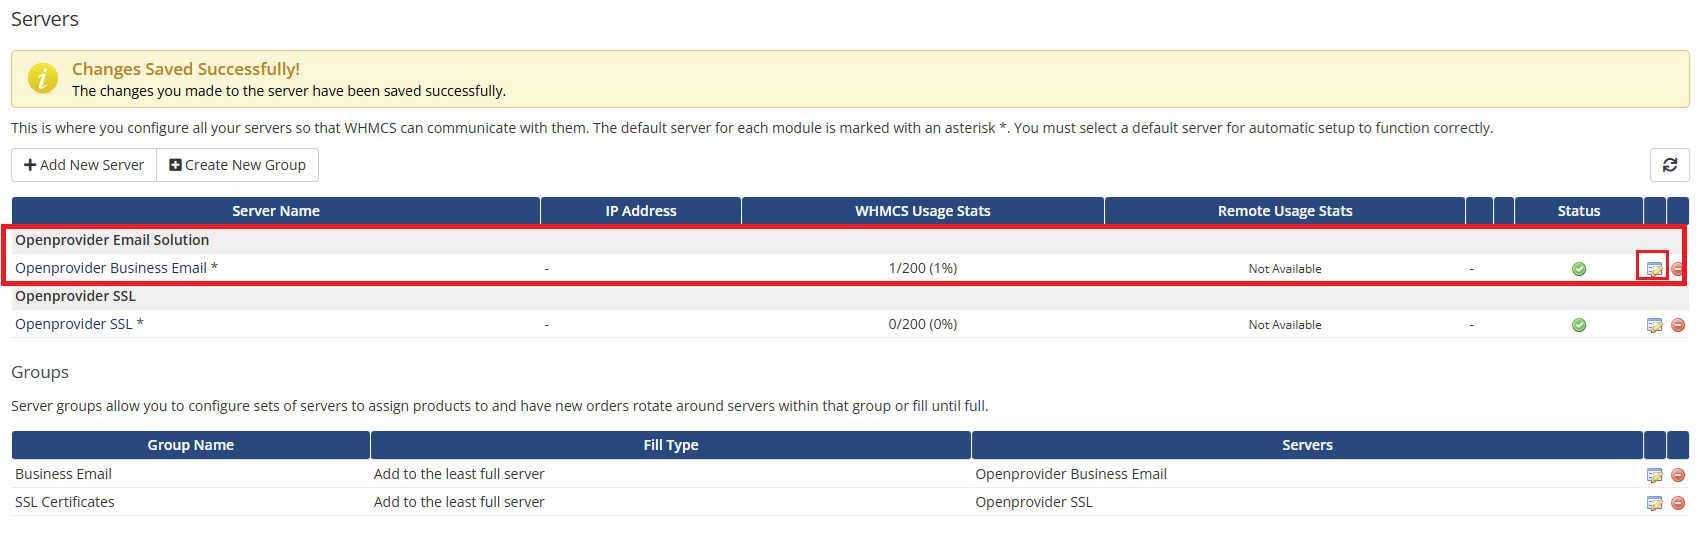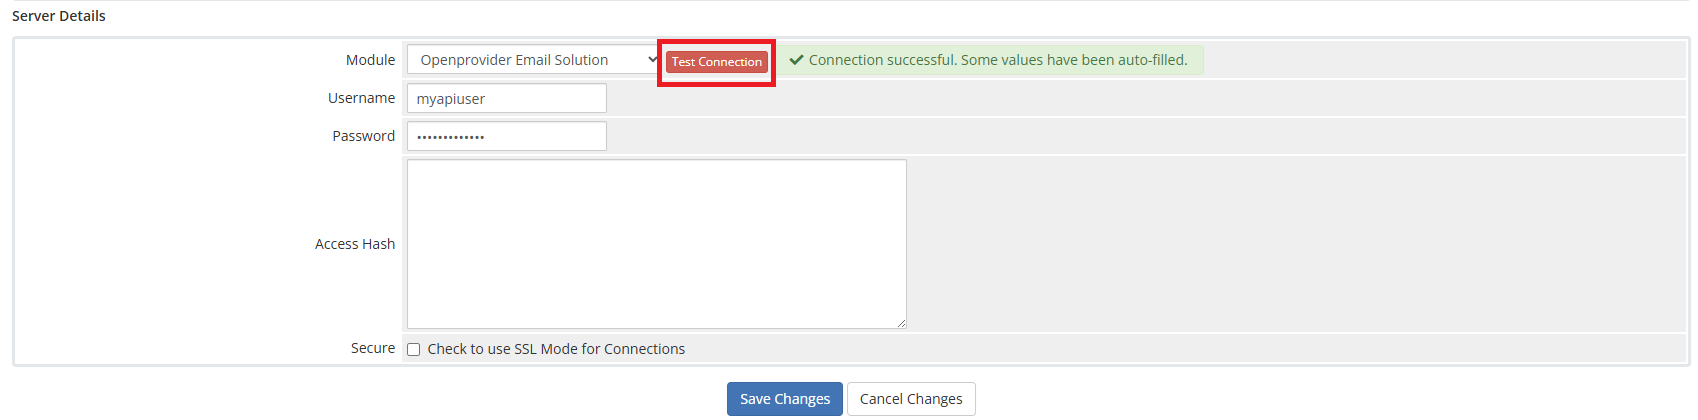5\. Now, create a new server group. Click on **Create New Group.**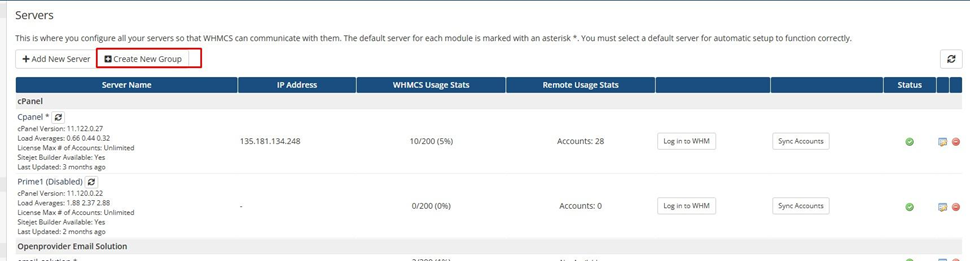6\. On the new page:
- In the **Name** field, enter the server group name.
- Select the desired server from the list.
- Click the **Add** button to include the selected server in the group.
Once all required servers are added, click the **Save** button to create the server group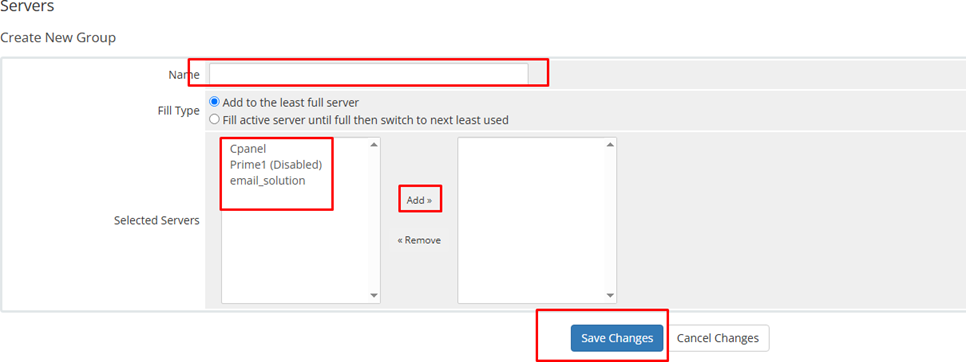### 3. How to create a product group and a product?
1. Go to **System Settings >> Find Product/Service** and click on it.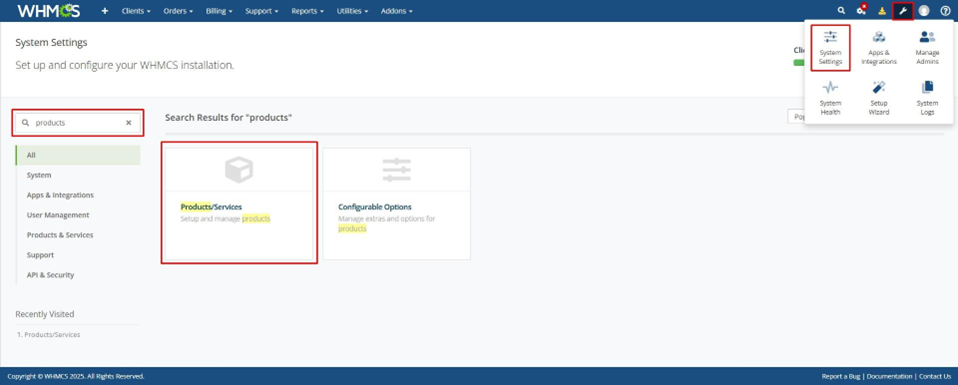2\. You will now be on the Products page. Click on the **Create a New Group** button. Enter the Product Group Name. You can also add a headline and tagline, select the Order Form and Payment Gateway, or choose to set the group as hidden. Once you've entered all the details, click **Save Changes**.
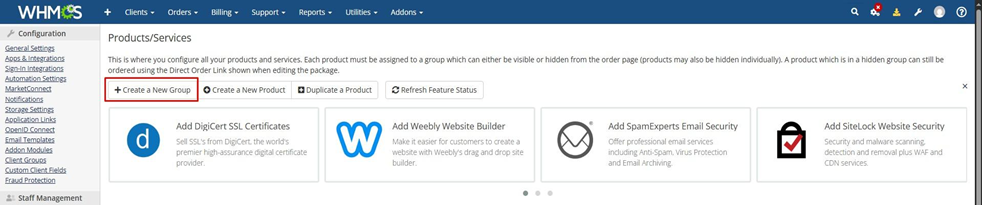
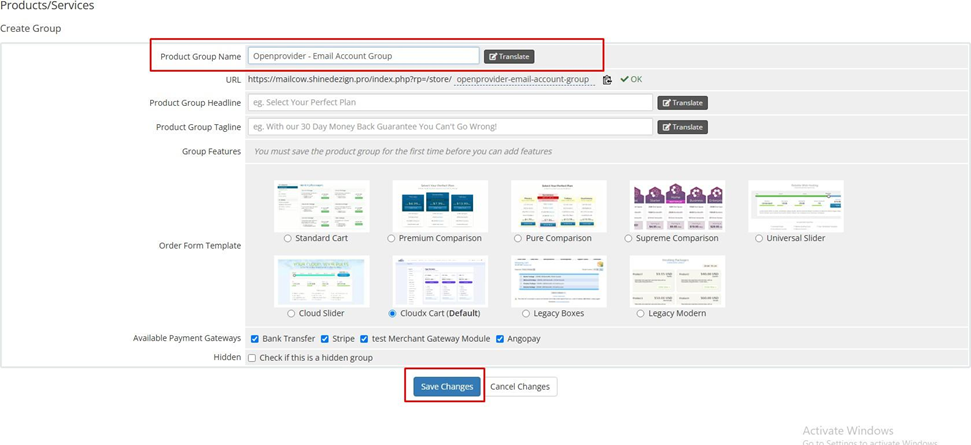
3\. Your product group has been created. Now, click on the **Back to Product List** button. You will see the newly created product group on the Products page. Next, click on the **Create a New Product** button.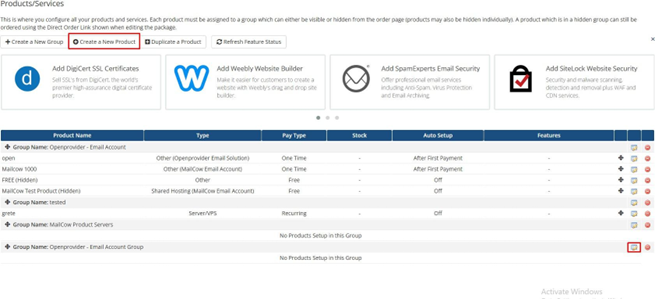
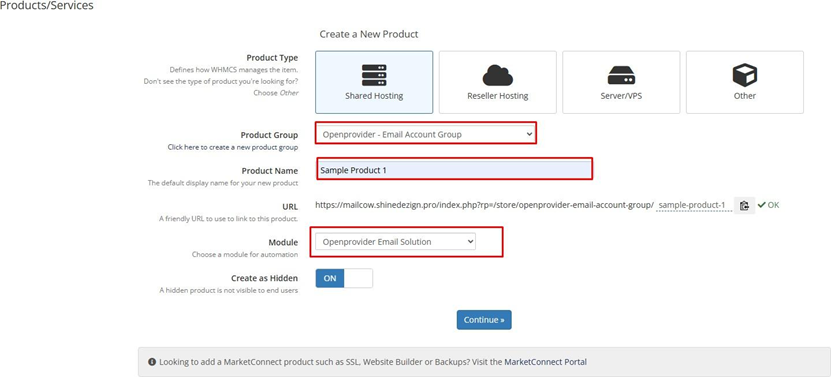
4\. Now you have to enter the details for the new product:
- **Product Type**: Select the product type.
- **Product Group**: Choose the desired product group for this product.
- **Product Name**: Enter the product name.
- **Module**: Select the server module (e.g., Openprovider - email solution).
- **Create as Hidden**: Check this option ONLY if you want to keep the product hidden.
After entering all the details, click on **Continue**.
5\. In the Product **'Details'** tab, enter the **tagline**, **short description**, and **full description** for the product. Then, go to the **Pricing** tab and set the product price (Free, One Time, or Recurring). Finally, click **Save Changes**.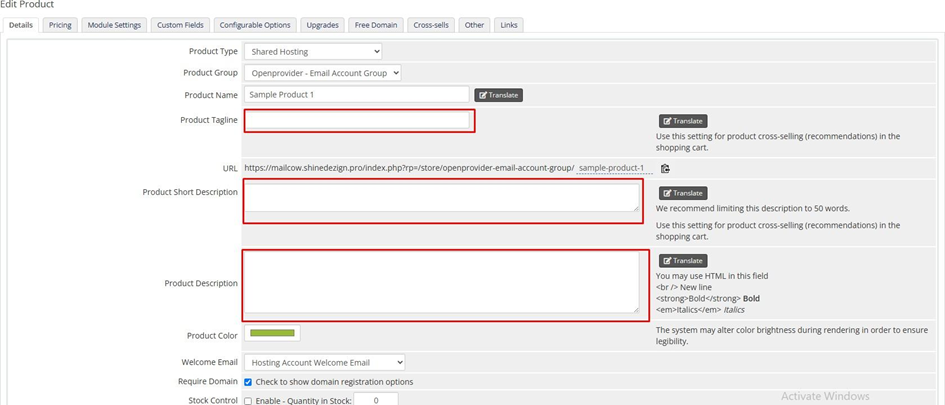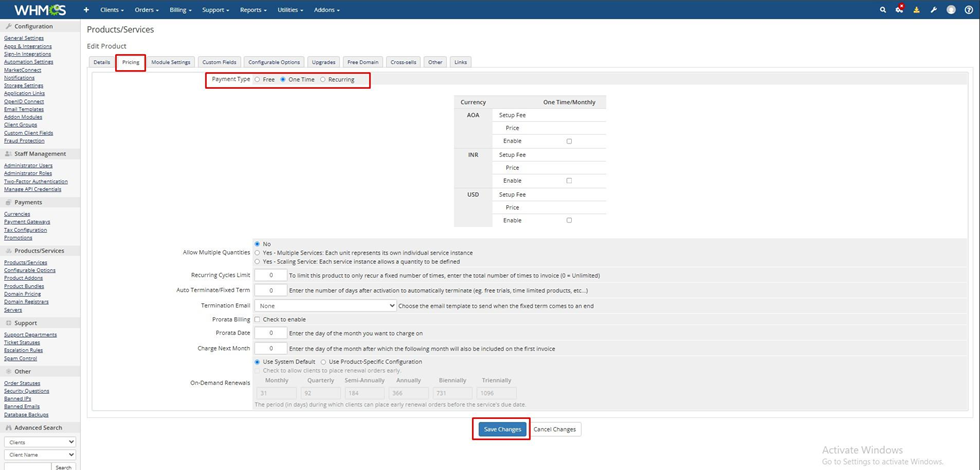
### 4. How to configure the product with the server module?
- Go to **Configuration** >> **System Settings >> Find product/service** and click on it.
**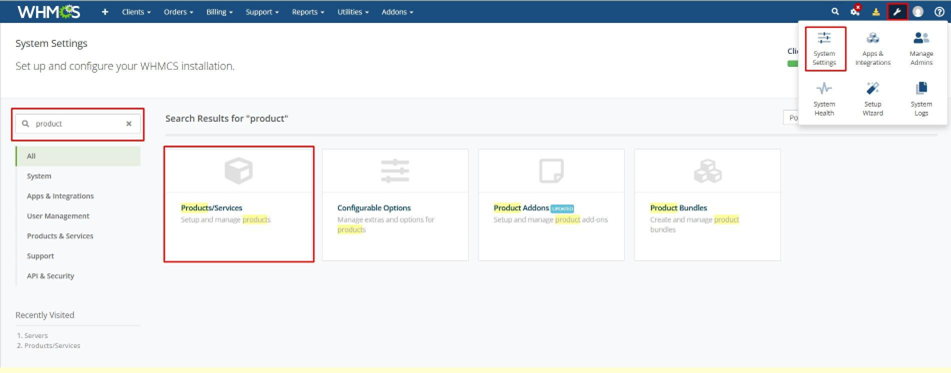**
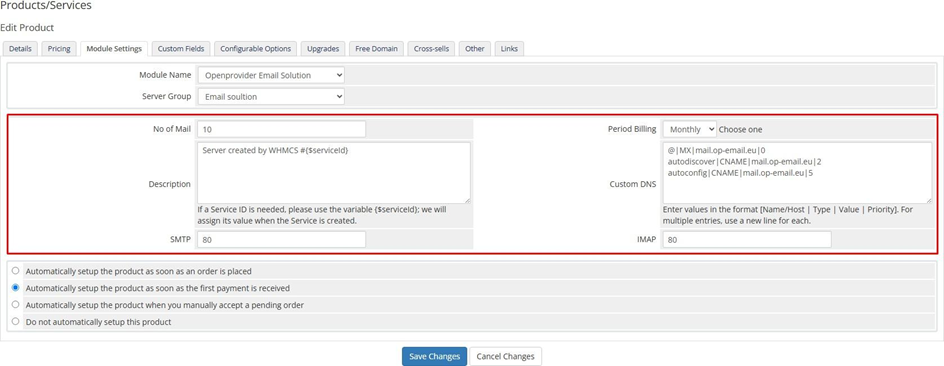
- Edit the product and go to the module settings.
- Select the **Openprovider Email Solution** server module.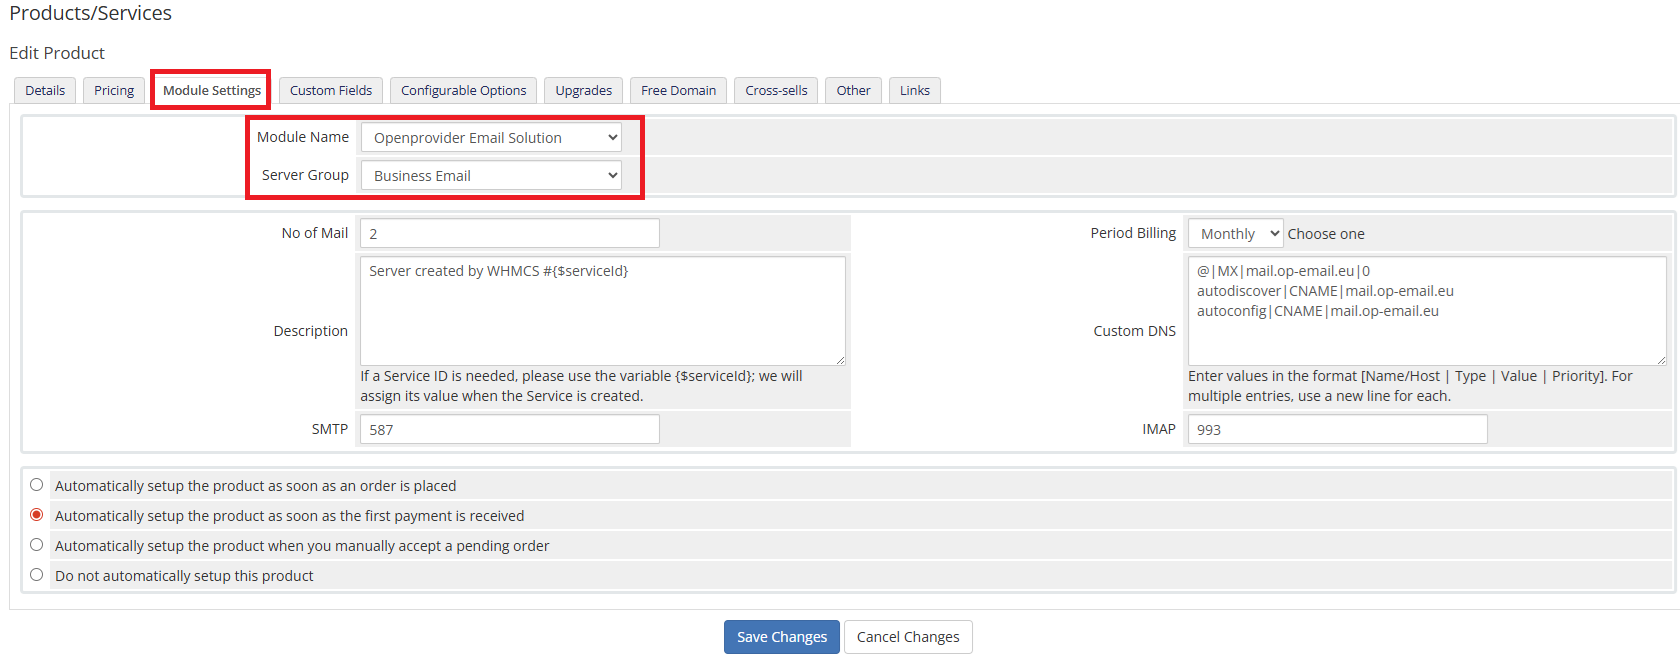- 3. In the module configuration options, you need to configure the module with the following settings:
- **No of Mail**: Enter the number of email accounts you want to offer per order.
- **Period Billing**: Select the billing period (monthly or yearly).
- **Description**: Enter the service description. If a Service ID is needed, use the variable
**{$serviceId} - its value will be assigned when the service is created.**
- **Custom DNS**: Enter the custom DNS values in the following format:
**\[Name/Host | Type | Value | Priority\]**Eg: @|MX|mail.op-email.eu|0And for multiple entries, use a new line for each.
- SMTP: Enter the SMTP port here - **587**
- IMAP: Enter the IMAP port here - **993**
**Note: Custom mail settings (DNS, SMTP, IMAP) will appear after checkout. Leave these as Default unless you are using a white-labeled mail server.**
4\. After filling all the configurable options, click on the **Save Changes** button.